PhotobucketPhotobucketPhotobucketPhotobucket
Showing posts with label TEDxJakarta. Show all posts

Sunday, February 12, 2012

DIY: T-Shirt Application Special Hug Campaign


This is my first time making tutorial with Photoshop! WOHOOO.. i never learn how to use Photoshop, so this is my personal achievement!!! *grins* 

You know why i like making tutorials and share it, because when you need to do something and you don't know how to do it, you google and you stumble on the tutorial you need, it feels like that person help you. Just like me tonight with Photoshop. So i want to pay if forward. Hope someone need this tutorial (who knows :p)

Due to very (very very very) basic knowledge of Photoshop, i choose the simple arrangement based on P.S.- I made this tutorial style. Enjoy!


PS. well actually i have another variation on the white tshirt, but i don't know how to make it shadowy, if not it blends with the background. D'oh! *facepalm* DONE! ;)

Hug Campaign Special Valentine!

 A hug is like a bandage to a hurting wound.  ~Unknown

Last year, our TEDxJakarta arranged surprise Free Hug Campaign, it was started as one simple "what-if" tweet a night before 14th Feb, and someone put hashtag #HugCampaign on it, and the rest was history, it grew bigger and bigger over night and on the D-day, local radio picked it up and interview the curator about the event.

What people might not at the time was : we haven't get any single contact or permission from the management of Pacific Place, the mall which we planned to have the campaign. hehehe.. i know, crazy rite?!

but none can resist the growing buzz, not even the management, so short story, we got the permission and its a success! not to mention i got hugged by Angga Maliq & D'essential! *jaw opens*

It was so much fun! (I did get a flu afterward, no big deal! heheh)

photo montage of Hug Campaign 2011 (i'm the one holding all posters and hug campaign writing on the floor *guilty*)

This year, YES! we plan on doing it again, with some TEDxJakarta mini talks in the end of the day as you can see here


Lesson learned from last hug campaign was : the BIGGER the sign, the MORE you get hugged (not that we count, lol!). Thus, I decorate a pair of TEDxJakarta tshirt on the back side, to attract more ppl to hug campaign and obviously to get more hugs! (yess, gw fakir peluk hahahaha)

How to/tutorial making the tshirt is on the next post here.


If you happen to be in Jakarta on 14th February, drop by to Pacific Place and i'll be gladly offer you a hug. *winks*

Monday, December 13, 2010

Don’t Throw It, Tote It!

In the spirit of TEDxJakarta that will have its 6th event on 19th December (yes, a week from now), I create this tote bag from oversized TEDxJakarta tee. Yet, you can also create this tote using any kind of tee that you want to up cycle


You only need a tee (of course!), I used Large size tee here, stretchy cotton fabric for the inside, webbing and pairs of snap button. 

      
Start by removing sleeves and seams off the tee. Mark and cut your pattern. Make sure you have 2 bodies with 2 sides and 1 base, same number with the lining. Mine is 40 x 45 cm with 7 cm width, don’t forget to add 1 cm for seam line 


Take the body and the base, with right sides meet together pin and mark your seam line. Sew it and stop 1cm from the edge. Do the same thing with the other body. 
Important:  all the seam lines must be the same, so when you start sewing the side it will become easier. Tips: put paper below your tee when you sew it, it will prevent the tee to jam in your machine since the fabric is stretchy. And don’t forget to double your seam ends. 
Take one of the sides, with right sides meet together pin and mark your seam line. Sew it and stop 1cm from the edge. Do the same thing with the other side. 
Now, pay attention to the picture. You will have this shape, then what you have to do is meet the right sides of the side and the body just like the picture suggest. A with A, B and B, so forth.
 
Voila! You made the outer skin of the bag. Do the same step for the lining. 

To make it a complete bag, put the outer inside the lining with the right sides meet. Then cut the webbing as you desire, mine is 55 cm long. Slip the webbing between the outer and the lining. Pin securely so that the webbing won’t move while you sew them. Leave 15 cm gap on the side

Reverse the bag by pulling it through the gap you just made. You will have the shape like the picture. We almost done here. 

 Iron a bit the opening to make it easier for sewing the lines. Sew two lines to make it stronger. 


To give some shape, I sew snap buttons on the sides. See the difference. Nicer eh?! :D 

 
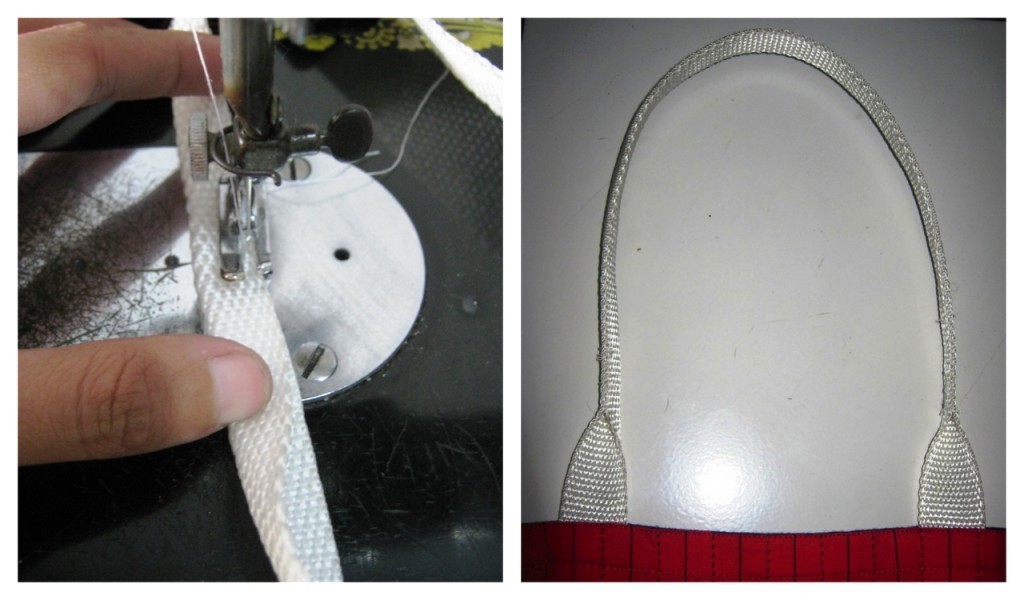
 Last step, to make the bag easier to carry, make the webbing smaller by fold it in two and sew it.


I have tested the tote bag, and surprisingly it is strong! I put laptop and charger in the bag, add with camera and its charger, clutch, a water bottle, battery and the strength of the tote bag made me proud *big grin*


Still dont have any idea what is TEDxJakarta that i mentioned earlier? Check this out >> www.tedxjkt.org


with love,
an.indya