PhotobucketPhotobucketPhotobucketPhotobucket
Showing posts with label sewing. Show all posts

Thursday, August 9, 2012

DIY: Romper from Men's Shirt


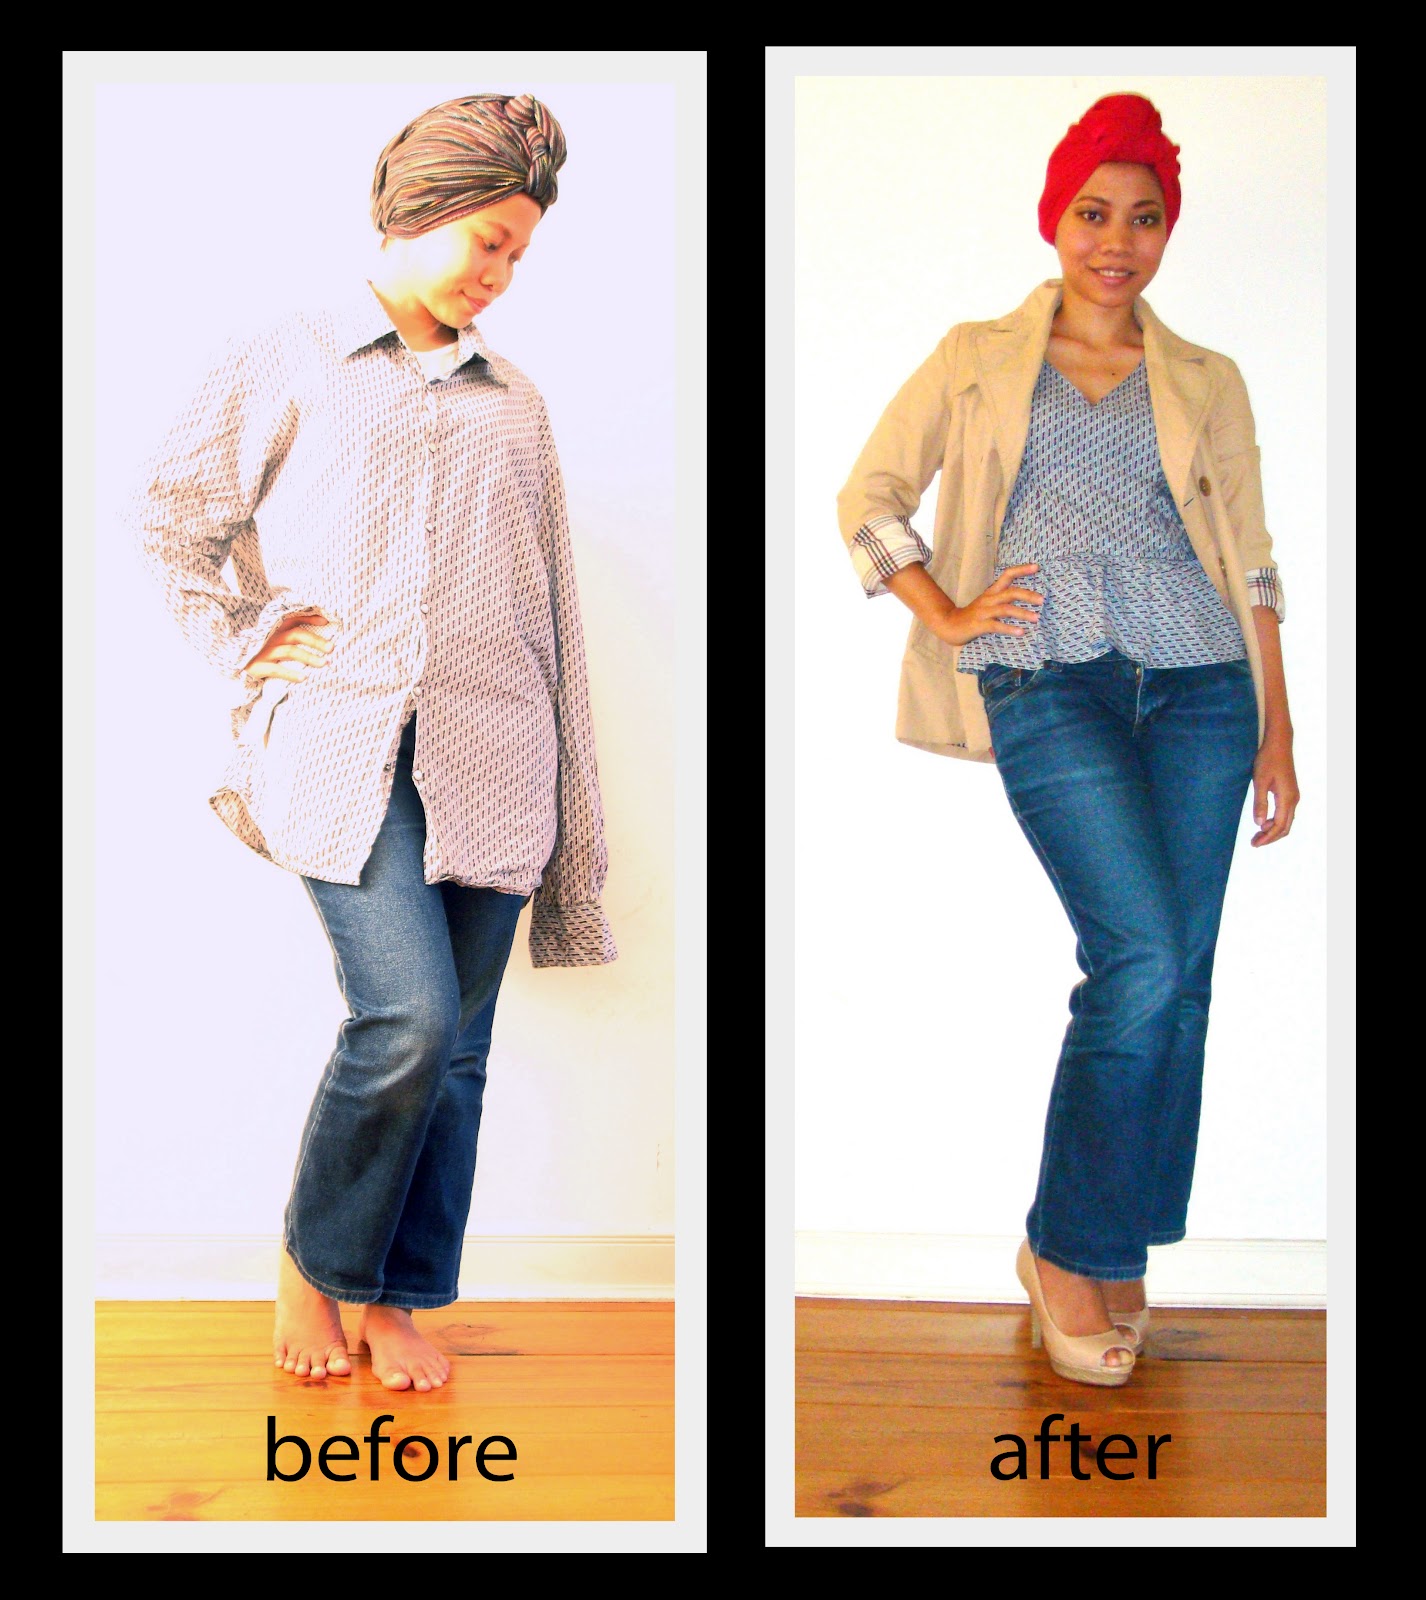
Another DIY project, recreating new clothes out of old clothes. 

This time featuring elastic waist, shirring details and racer back cut complete with tutorial. 


Supplies and Tools:
Unused XL shirt from your husband/SO/boyfriend or thrift store, especially that has nice detail on the side
Shorts for pattern
Elastic band (I use 5mm)
Elastic thread
Matching thread
Bias tape maker (if you don’t have it, no worries)
Sewing machine
Sewing pin
Safety pin
Sewing machine
Scissors

How to:


Cut sleeves, collar and the inside yoke.

Measure length from your shoulder to slightly under your waist and then cut the bodice.

The below bodice will be use as the bottom part (shorts)

Open wide the below bodice, cut in half right in the middle.

(I did this since I want to preserve the side detail and also it less sew for me in making the shorts)

Salvage one of the sleeves to add to the sides.


Trace pattern from the short you have and arrange it as in the picture.

The bottom part has no front opening, so make sure the width of the top opening is larger than your hip measurement

With right side facing each other, pin and sew the sides. 

To sew the crotch, put the fabric like normal short, wrong side up. 

Pin and sew the crotch.

Hem all the bottom edge of the shorts.

You finished the bottom part of the romper
Next, create a racer back on the back side of the top.Cut in curve or C-shaped

Before attaching the top and bottom part, make sure you have the same opening size. If its larger, pinch as your measurement from the sleeves opening. 

Attach the top part and the bottom part by facing the right side together.

Pin and sew the parts by giving enough seam allowance for the elastic band (i.e if your elastic band 1 cm size, sew 2 cm minimum from the side)

TIP: you can add length by salvaging fabric from the sleeves if you want to lengthen the bottom/top part


At this stage, you almost done but the shape of your new romper is unflattering.

To make it more fitted, smock or shirr the back side using elastic thread.

Technique on how to shirred you can read from here or if you're like me who use a Brother machine, use this technique instead.

I created 9 rows of 20 cm shirred on the back, with 1 cm space in between.


Using the seam allowance, sew around the waist but leave 2 cm opening for the elastic band.

Use safety pin to ease your way inserting elastic band.

Tie the elastic band per your measurement, and shut closed the opening gap.


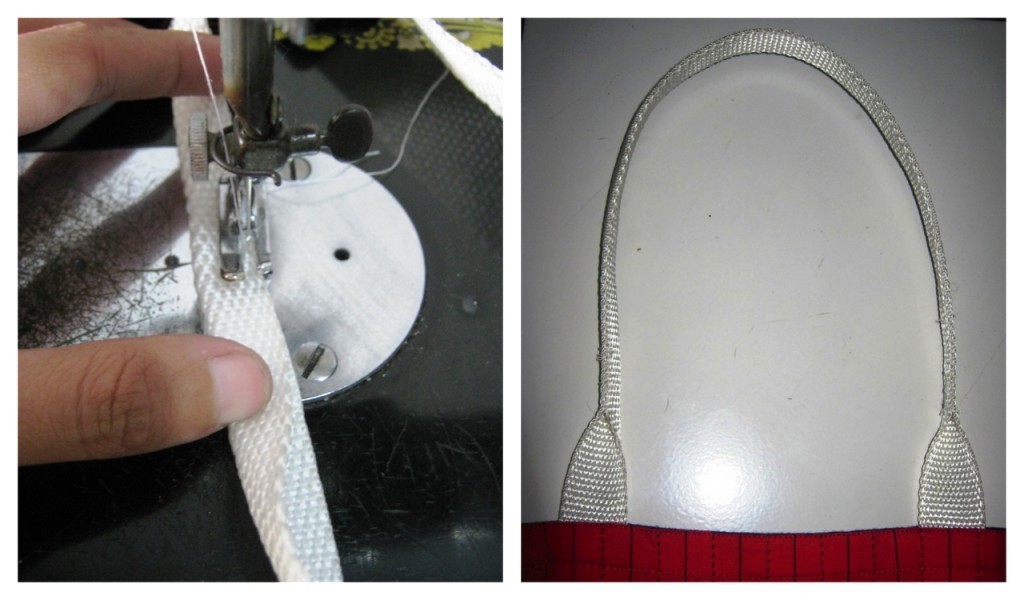
To finished the neckline and the arm hole, make bias tape from the inside yoke. 

If you have bias tape maker, it'll be easier, if not, check this and this awesome tutorial on how to make DIY bias tape without one.


last and the most important part of making this clothing: WEAR IT LIKE A BOSS ;)


Monday, August 6, 2012

DIY: tulle maxi skirt


This post is the continuation of this previous post. Making it is so simple, any beginner sewist able to do this.

Supplies:
Tulle, I used 4 m long for this project
Polyester lining
Elastic band, commonly found in black color

How to:
  1. Create A-line skirt using the lining fabric. Since this not using any opening on the waist, make sure the skirt waist size is larger than your hip size
  2. Gather tulle and match the length to the waist size of the skirt, sew the side.
  3. Sew together tulle and the lining so it become easier to be attached to the elastic band.
  4. Measure elastic band on your waist, it should be tight enough but not suffocating you.
  5. Sew the elastic band to a loop, and attach the skirt+tulle to elastic band.  Always pull the elastic band while you are sewing.
  6. DONE! Admire your work ;)


Thursday, August 2, 2012

DIY: peplum top from men shirt


In the event of clearing up his closet so my clothes can be fitted in, I end up with ten or more old and unused XL size men shirt, jeans, and sweater.  I have my eyes on some of the shirt that has either interesting button or pattern and a tad reluctant to give it out to charity.

Short google on how to alter men shirt to any women clothing, I found trash to couture site and this refashion hooked me
source : trash to couture

I have the right shirt for this project, with snap button… and the project begun!


front view

back view

How to:
  1.  If you can make pattern for the bodice, that’s great! But I couldn’t, so I trace the bodice panel pattern from dress that I have.
  2.  Separate the sleeves, yoke, collar, hem from the shirt using seam ripper. I use the shirt’s back panel for the front bodice, front panel with the button became back panel. Shirt sleeves for the peplum (I cut it in two so I can have the tail effect on the back peplum) and yoke for sleeves panel.
  3.  Sew and fit it to your body.  In my case, I have to add more darts in front panel


one more photo won't hurt ;)

Saturday, July 28, 2012

DIY : Waterfall Jacket


Ed gave me brand new sewing machine as a wedding gift, so far I only use it once to trim the shower curtain. It’s about time to use it some more.

Since I moved here in Dordrecht and got to know how “weird” the daily weather can be (imagine, 5 minute sunny and the next 5 minutes raining heavily.. pheww) I started the quest of finding a light cardigan/jacket, that can be double with coat without making myself look like bulky wiener.

Online shopping in NL? Hmmmm.. not sure they have petite size and I still have that mini heart attack everytime I see price tag on clothing here.. *sweat*
Buy from online shop in Indonesia? Errr.. the shipping cost is more expensive than the clothing price

Solution: make your own jacket!

Front view

side view (the waterfall effect is visible here)

rear view

my fave pair of shoes which happen to be my wedding shoes as well ;)


I use McCall waterfall jacket pattern (pic of McCall) that I ordered from here  but made alteration on the sleeve size. Overall I only use sleeve, and bodice pattern.
The waterfall part of the jacket, I lined it with the same fabric since the wrong side wasn’t the same as the right side.

Total price: 21 euro
Fabric: 5 euro
Pattern: 16 euro
Not bad at all..

Sunday, February 12, 2012

DIY: T-Shirt Application Special Hug Campaign


This is my first time making tutorial with Photoshop! WOHOOO.. i never learn how to use Photoshop, so this is my personal achievement!!! *grins* 

You know why i like making tutorials and share it, because when you need to do something and you don't know how to do it, you google and you stumble on the tutorial you need, it feels like that person help you. Just like me tonight with Photoshop. So i want to pay if forward. Hope someone need this tutorial (who knows :p)

Due to very (very very very) basic knowledge of Photoshop, i choose the simple arrangement based on P.S.- I made this tutorial style. Enjoy!


PS. well actually i have another variation on the white tshirt, but i don't know how to make it shadowy, if not it blends with the background. D'oh! *facepalm* DONE! ;)

Monday, January 23, 2012

Blog to Follow : Studs and Pearls

I stumbled upon this blog when i were shopping for ideas for voormeisje next collection. She's a DIY fashion blogger and reside in NYC. Photo speaks more than words, so check pictures below.
DIY Lanyard Bracelet


DIY Galaxy Handbag


DIY tube scarf from thrift sweater
DIY leather sleeved denim jacket (again from thrift denim)
Simply awesome!

Her posts on making new clothes out of thrift clothes are brilliants. Somebody take me to Pasar Senen to get thrift clothes please!! *muntah pelangi*.

In the meantime, check her blog here : http://www.studs-and-pearls.com


PS : with this I'm more convinced on getting sewing machine as my wedding mahar.. *grins*

Wednesday, January 11, 2012

When in Boredom, Do It Yourself


I have this leftover nude colored tulle from a year ago when I tried to be an accessories vendor. Since today I’m ultra bored and failed picking a fight with Dutchie, I decided to shop for ideas and tutorial to make that leftover tulle something I can wear.

Found this super easy Jill Sanders’ inspired maxi skirt tutorial from A Pair and A Spare and elastic band skirt from Chic Steals. And you know what, maxi skirt never goes out of style.
Jill Sander Spring 2011 (style.com)
Chloe 2011 (style.com)

Next Project : Elastic Band Tulle Maxi Skirt it is! Hope I can make it in one shot and create tutorial out of it. ;)

Tuesday, May 31, 2011

DIY Custom Made : Batik Fever


Last two requests that I got was turning batik into tote bag and clutch bag. A bit tricky, since personally I like everything to be color matched and with batik, that's impossible.

But hey, the customers love it and its enough for me ;)


Tote bag was from Pekalongan's batik, the sides was different motifs but came from the same fabric, I contrasted the inner lining and also the bag handle. That's the very first time I made something out of leather.


The clutch bag has two compartments, each flap has it own space. This one came from two different fabrics. The green in the middle was Madura's Batik, personally I found its difficult to match it with anything! But somehow it worked with the mixed motifs batik I found in Mayestik.


with love, 

.anien.

Monday, April 11, 2011

Start Small : voormeisje online store

Yes, I changed this blog background again.. which I often do to push myself writing again.
Yes, I finished working in the private bank.. which I have no regret leaving it whatsoever

and YES.. I CREATE MY FIRST HANDMADE ONLINE SHOP!
 
meet my baby : 

voormeisje (read : for mesye) derived from dutch words : voor meisjes meaning "for Misses". a particular person always called me Meisje, and hey, lets just make it immortal by using it for the shop name. 

I lack of experience in becoming entrepreneur, nevertheless i enjoy making all this clutch bags. Small step better than no step at all right?!

Right now, i only put clutch bags there but hey, who knows it will become bigger and with more variety of products yet still handmade one.


Do take a look my baby here >> www.gogirlmagz.com/store/voormeisje

Friday, February 4, 2011

DIY Project : Stitch Stitch.. Stitch My Heart Good


Sometimes i become so infatuated with something and suddenly i have this grand plan in my mind to do everything, without realizing that i have no time to make all that come true. This time, my infatuation is with stitching..

A sneak peek of my stitching project.

guess what is that?! ;)

I guess this mirror my wish to be able to mend and stitch my broken heart, as i was just being kicked out of relationship. 

love, 
an.indya

Monday, December 13, 2010

Don’t Throw It, Tote It!

In the spirit of TEDxJakarta that will have its 6th event on 19th December (yes, a week from now), I create this tote bag from oversized TEDxJakarta tee. Yet, you can also create this tote using any kind of tee that you want to up cycle


You only need a tee (of course!), I used Large size tee here, stretchy cotton fabric for the inside, webbing and pairs of snap button. 

      
Start by removing sleeves and seams off the tee. Mark and cut your pattern. Make sure you have 2 bodies with 2 sides and 1 base, same number with the lining. Mine is 40 x 45 cm with 7 cm width, don’t forget to add 1 cm for seam line 


Take the body and the base, with right sides meet together pin and mark your seam line. Sew it and stop 1cm from the edge. Do the same thing with the other body. 
Important:  all the seam lines must be the same, so when you start sewing the side it will become easier. Tips: put paper below your tee when you sew it, it will prevent the tee to jam in your machine since the fabric is stretchy. And don’t forget to double your seam ends. 
Take one of the sides, with right sides meet together pin and mark your seam line. Sew it and stop 1cm from the edge. Do the same thing with the other side. 
Now, pay attention to the picture. You will have this shape, then what you have to do is meet the right sides of the side and the body just like the picture suggest. A with A, B and B, so forth.
 
Voila! You made the outer skin of the bag. Do the same step for the lining. 

To make it a complete bag, put the outer inside the lining with the right sides meet. Then cut the webbing as you desire, mine is 55 cm long. Slip the webbing between the outer and the lining. Pin securely so that the webbing won’t move while you sew them. Leave 15 cm gap on the side

Reverse the bag by pulling it through the gap you just made. You will have the shape like the picture. We almost done here. 

 Iron a bit the opening to make it easier for sewing the lines. Sew two lines to make it stronger. 


To give some shape, I sew snap buttons on the sides. See the difference. Nicer eh?! :D 

 
 Last step, to make the bag easier to carry, make the webbing smaller by fold it in two and sew it.


I have tested the tote bag, and surprisingly it is strong! I put laptop and charger in the bag, add with camera and its charger, clutch, a water bottle, battery and the strength of the tote bag made me proud *big grin*


Still dont have any idea what is TEDxJakarta that i mentioned earlier? Check this out >> www.tedxjkt.org


with love,
an.indya